|
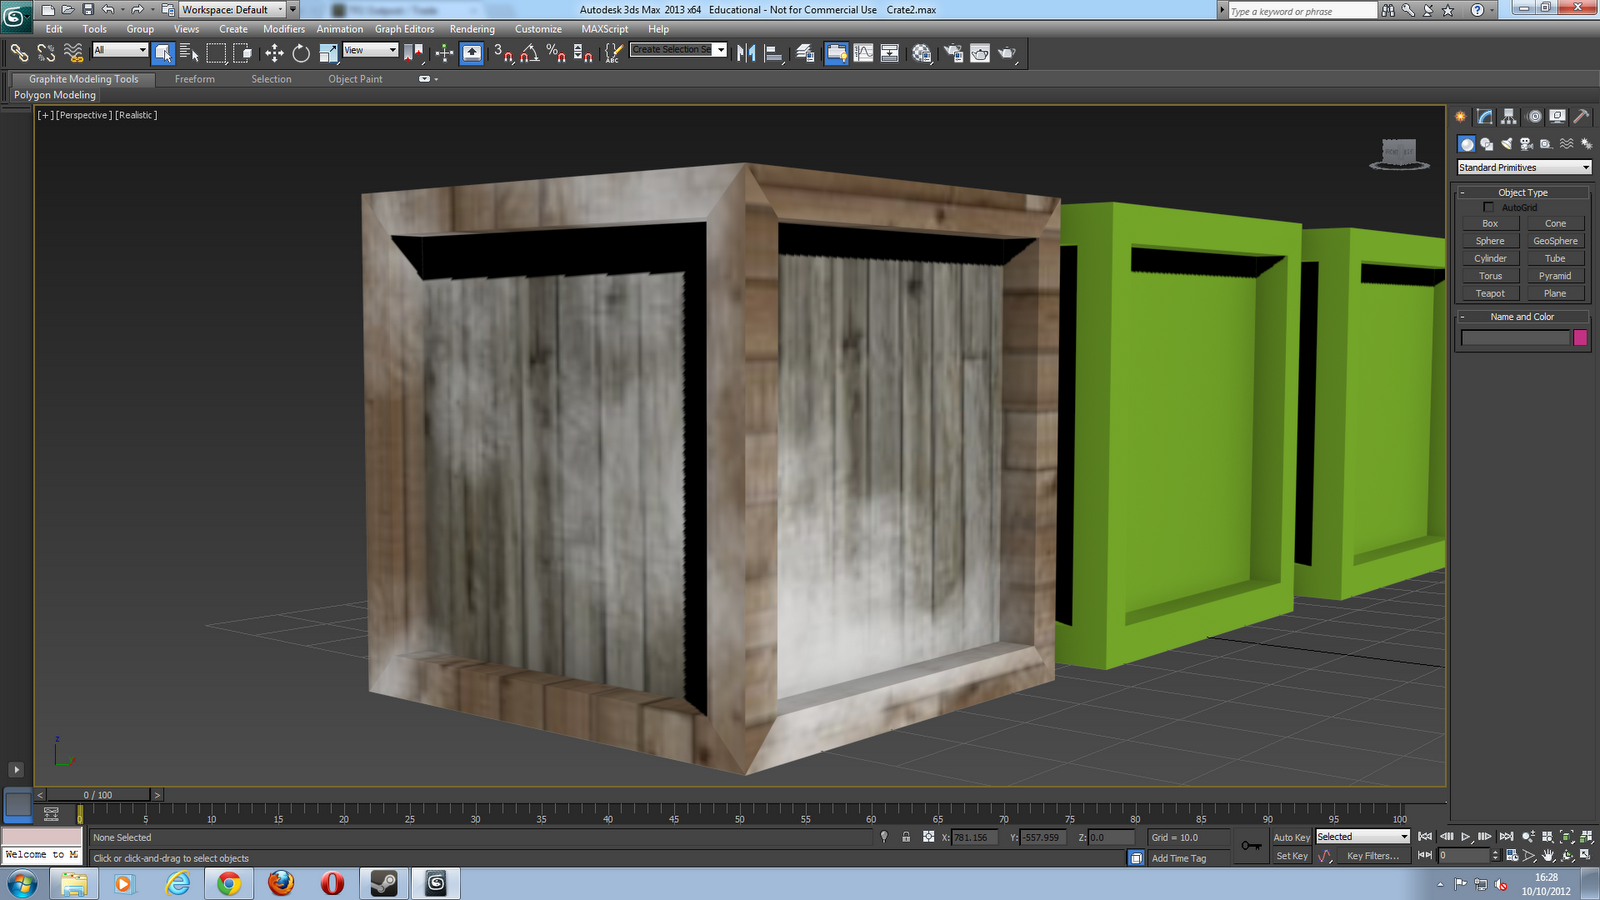
Here are my boxes in the Stage Mode, this is what they look like not
rendered. |
[1] Create a cube by going to the right side bar and pressing on Cube. Draw it out, onto the stage.
[2] After doing so, click on the cube, and press the Unwrap UVWs from the editorial menu.
[3] Open the
UV Editor to enable editing on the cube itself.
[4] There will be 3 options on the bottom left of the window, click the
Polygon selection, which will let you edit the polygon's of the shape.
[5] Clicking the side of the cube shape will then open the UV editor itself and show the selection you have picked. (Clicking multiple sides of the shapes will stack the face on top of the other, letting you see the sides of the shape that correspond with the other.) You can move these faces, and it will move and modify the texture around that face. Selecting '
Reset UVW Editor' will delete the progress made.
[6] Click onto the checker pattern to make the faces clear, and editable to what texture you would like to add on. These are the areas where the texture will apply to (the goal is to make the texture as clear as possible).
[7] By pressing
Ctrl+A, you will select all the faces of the polygon in the stage window (in this case, the cube's polygons).
[8] In the window, go to
Mapping > Unfold Mapping. When this is done, make sure that the closest face is selected and the '
Normalize Clusters' are ticked, so there are no breakages in the shape itself. This will unfold the shape into a cube mod, showing all 6 sides of the shape in a template.
[9] After everything is done, click the
Element button, which is right next to the Polygon button in the Mapping window. This selects the whole netting of the cube in one swoop. (Clicking the element button again will reset the faces so they're unselected and you can select them individually if needed.)
[10] When it is all selected, on the top bar there is an Angle Snap selection. By clicking that, you can rotate the netting that you have just made and place it to its side, making it fit perfectly in the space provided.
[11] Now that that's done, click
Tools > Render UVW Template. This will render the template you have made for the cube netting. You have to ensure that the picture quality you will be placing onto the cube itself is great quality, so that if it was used in a 3D animation or a Game, the texture will look good quality. When you have found the best size for your cube (in this case 1024x1024), you can then save this netting as a
.JPEG or
.PNG to import it into Photoshop or some other medium.
[12] Because you have done this import, you can now add your own textures onto the cube netting yourself. Make sure to label the sides according to the 3D elements, so that you don't have a jumbled up cube. Using rulers and other ways to measure the size of the sides of the cube, or shape of your choice can really help make the netting really work and fit perfectly on your cube. Now, with your guidelines, add your textures/images onto each of the empty squares provided. When you are finished, merge the layers and keep the file either a
.PSD (if you are using Photoshop) or a
.PNG/.JPEG.
[13] Go back to the 3D program and
press M. When the masking window pops up, click on
Modes > Compact.
[14] Open
Maps at the very bottom. When you have, diffuse the colour to none and then select Bitmap, which will let you to find the image file you created for the cube itself. This will then show the texture at the very top of the window in a sphere.
[15] Now that it shows you the texture, click and drag the sphere at the top of the window and let go when you have your mouse hovering over your cube on the stage. Now select Show Shaded Material in Viewport, which is the little light bulb by a checkerboard pattern. The material will now be viable on the stage so that you know it looks okay.
[16] When you are happy with what your texture looks like, go to the top bar of the main window and click the Teapot to render the image to see what it looks like. If the rendered image doesn't look to plan, you can actually go back to it on Photoshop and edit the image itself so that it fits perfectly to your standard and just save. It should update your texture in 3ds Max without you having to worry about redoing it all over again.
[17] Now, going back to the Cube itself, convert it to an Editable Poly so it is ready to be placed into a game engine at any point, if you ever choose to.
[18] Your box is now complete. Select a Plane from the right hand side bar and draw it underneath the box. This is the floor, where shadows will be cast.
[19] Press M again, find a repeating texture you like and add it to the board. Now, underneath the spheres, there are co-ordinates where you can change the tiling. Because it's a repeating image for the floor, put a value of 6.0 into both boxes underneath 'Tiling'. It's always best to tile by the power of 2, because that's how everything goes by. When you are done, apply that to your flooring.
[20] To add lighting to the scene, to make the flooring have a purpose, click on the sun-like icon in the right hand corner bar. This will give you a selection of lights for you to add onto the scene. Now place it onto the scene and select
Modifier Section.
[21] In the Modifier Section, you can turn on shadows, dim or intense the lighting or shadows, and play around with the tint of the light itself. And when you are done, click on the Teapot to render to see the final image.